In addition of the article about face recognition in iOS presenting this article
Machine Learning is a high intelligence algorithms system which is used to perform a specific task without using explicit instructions, relying on some previously defined patterns. Apple has Core ML framework that helps you to create personalized ML models without any ML knowledge and with almost no code.We are going to use Core ML 3, which is a Machine Learning framework that was by apple introduces in 2019. It presents much better performance and some new features and models.
The possible ML models are:
- Image Classifier – based on images content.
- Object Detector – finds multiple items inside of an image.
- Text Classifier – based on its contents and generate topics or categories.
- Word Tagger – mark interest words in text.
- Tabular Classifier/Regressor – based on tabular data.
- Sound Classifier (added in Core ML 3) – classify the most dominant sound.
- Activity Classifier (added in Core ML 3) – based on the contents of a variety of sensors motion data.
- Recommender (added in Core ML 3) – recommendations based on user behaviour and interaction on device.
There are two possible ways to create ML model. The first one is with Xcode Playground, and the second one is with using Create ML framework. At this tutorial we will focus on image and tabular models, which are the most commonly used ones.
Feel free to check out the example app:
https://github.com/msmobileapps/ML-Blog
Creating Image ML model
In the beginning, in order make a personalized model, create a “Training Data” folder and add inside at leats 2 folders with images. For example, name the first folder “Dog” and add it dogs pictures and the second folder “Cat” and add it cats pictures. Each folder should contain at least 10 pictures in order to get good results.
For the next step, create “Testing Data” folder with the same 2 folders but with different images (from the same category).
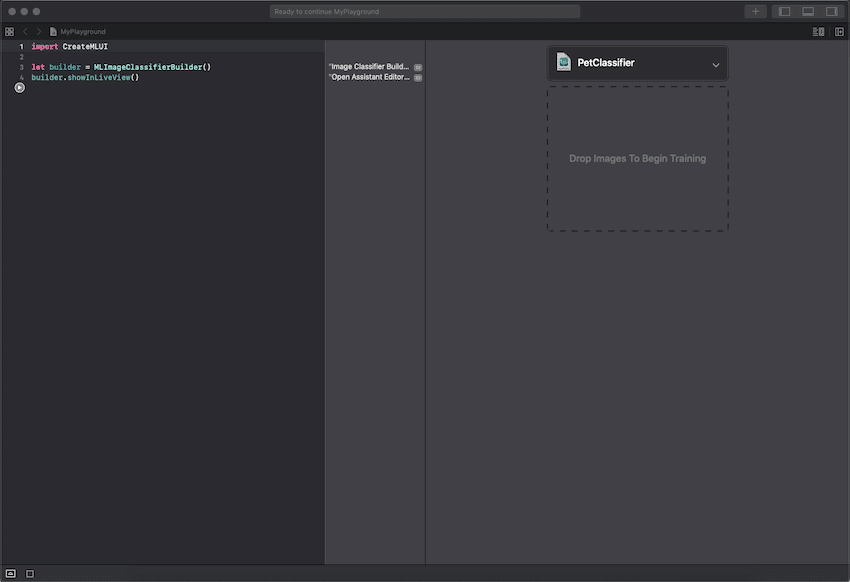
Open new MacOS Playground from Xcode. Write the next code lines:
import CreateMLUI

let builder = MLImageClassifierBuilder()
builder.showInLiveView()
Run the code and you will notice a ML interface is created in the right side of the screen.

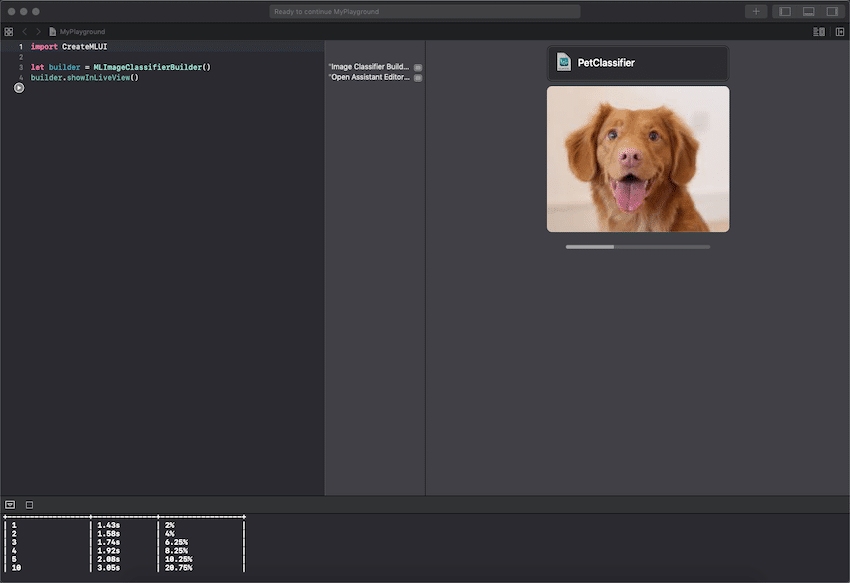
Click on the menu and choose the desired number of iteration and augmentations you want to add to improve the accuracy. For this tutorial we will use the default settings, but you are welcomed to change them, notice that it will require you to add higher number of images. Drag and drop the created “Training Data” folder into the interface.

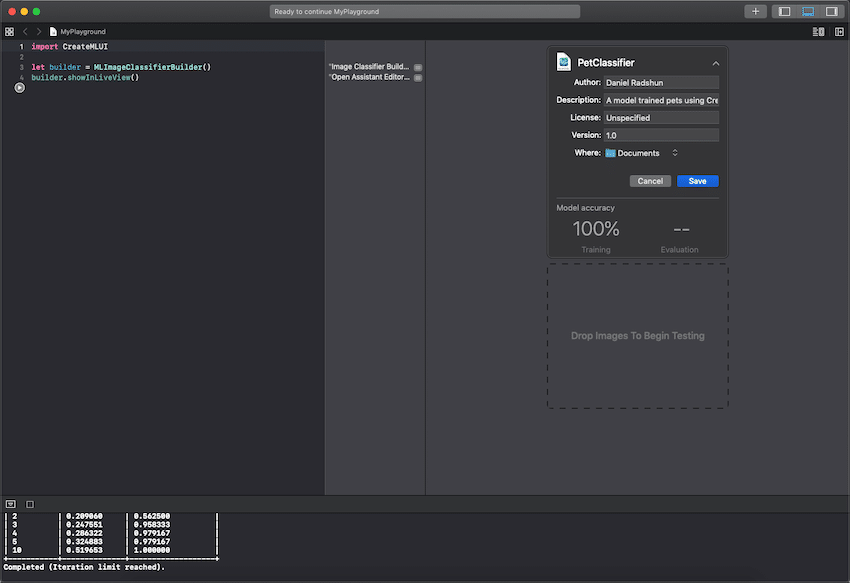
You will notice that the ML magic started working. When the process is done, name the model as you want (I named it “PetClassifier”) and save wherever you like.

Congratulation, you have created a ML model. Now, we would like to implement it in our app. Let’s start by creating a new Xcode project. In the ViewController import CoreML and add a model parameter and initialise it in the viewWillAppear function.
var model:PetClassifier!

model = PetClassifier()
Make a user interface that gets an image (for example, from the camera). The ML model works only with 299X299 dimensions images so convert the image into these dimensions. Then convert the image into CVPixelBuffer. This object is an image buffer that holds pixels in main memory which the ML model use to predicate the result.
private func convertImageTo299X299Dimensions(image:UIImage) -> CVPixelBuffer?{
        UIGraphicsBeginImageContextWithOptions(CGSize(width: 299, height: 299), true, 2.0)
        image.draw(in: CGRect(x: 0, y: 0, width: 299, height: 299))
        let newImage = UIGraphicsGetImageFromCurrentImageContext()!
        UIGraphicsEndImageContext()

        let attrs = [kCVPixelBufferCGImageCompatibilityKey: kCFBooleanTrue, kCVPixelBufferCGBitmapContextCompatibilityKey: kCFBooleanTrue] as CFDictionary
        var pixelBuffer : CVPixelBuffer?
        let status = CVPixelBufferCreate(kCFAllocatorDefault, Int(newImage.size.width), Int(newImage.size.height), kCVPixelFormatType_32ARGB, attrs, &pixelBuffer)
        guard (status == kCVReturnSuccess) else {
            return nil
        }

        CVPixelBufferLockBaseAddress(pixelBuffer!, CVPixelBufferLockFlags(rawValue: 0))
        let pixelData = CVPixelBufferGetBaseAddress(pixelBuffer!)

        let rgbColorSpace = CGColorSpaceCreateDeviceRGB()
        let context = CGContext(data: pixelData, width: Int(newImage.size.width), height: Int(newImage.size.height), bitsPerComponent: 8, bytesPerRow: CVPixelBufferGetBytesPerRow(pixelBuffer!), space: rgbColorSpace, bitmapInfo: CGImageAlphaInfo.noneSkipFirst.rawValue)

        context?.translateBy(x: 0, y: newImage.size.height)
        context?.scaleBy(x: 1.0, y: -1.0)

        UIGraphicsPushContext(context!)
        newImage.draw(in: CGRect(x: 0, y: 0, width: newImage.size.width, height: newImage.size.height))
        UIGraphicsPopContext()
        CVPixelBufferUnlockBaseAddress(pixelBuffer!, CVPixelBufferLockFlags(rawValue: 0))
        return pixelBuffer
    }
Then, call predicate function of our model in order to get a prediction output.
guard let prediction = try? model.prediction(image: pixelBuffer) else{
    return
}
Now when we got a prediction, we can call his classLabel and it will get us the output result of the ML model. You are welcomed to give it a try in the given app sample.
Creating Tabular Machine Learning model
In order to create such a model, you will need to have some data. I created a fake csv data file of car properties. You can download it from here:
The file contains data about cars from year 2000 to 2019 with the properties: year, engine, passed destination and price. Our model will learn the pattern of the data change and generate a calculated price (or any other parameter we choose) by this pattern.
Let’s open a new MacOS Playground and add the following lines:
import CreateML
import Foundation

let carData = try MLDataTable(contentsOf: URL(fileURLWithPath: “/Users/path/to/CarPrices.csv"))
let (trainingCSVData, testCSVData) = carData.randomSplit(by: 0.8, seed: 0)
In this lines, we create MLDataTable object with the csv file you have downloaded. Then we split the file data, 80% goes to train the ML and 20% goes to test it. The seed indicates from where we want to start the data binding.
Set the training data to trainingCSVData and the target column to “Price”:
let pricer = try MLRegressor(trainingData: trainingCSVData, targetColumn: "Price")Create training accuracy and evaluation:
let trainingAccuracy = (1.0 - pricer.trainingMetrics.maximumError) * 100
let validationAccuracy = (1.0 - pricer.validationMetrics.maximumError) * 100

let evaluationMetrics = pricer.evaluation(on: testCSVData)
let evaluationAccuracy = (1.0 - evaluationMetrics.maximumError) * 100
Create the author, the short description and the version metadata:
let modelMetadata = MLModelMetadata(author: "Daniel Radshun", shortDescription: "A model used to determine the price of a car based on some properties.", version: "1.0")For last, save the created file to the “Documents” folder:
let fileManager = FileManager.default
let documentDirectory = try fileManager.url(for: .documentDirectory, in: .userDomainMask, appropriateFor:nil, create:false)
let fileURL = documentDirectory.appendingPathComponent("CarPricer")
try pricer.write(to: fileURL, metadata: modelMetadata)
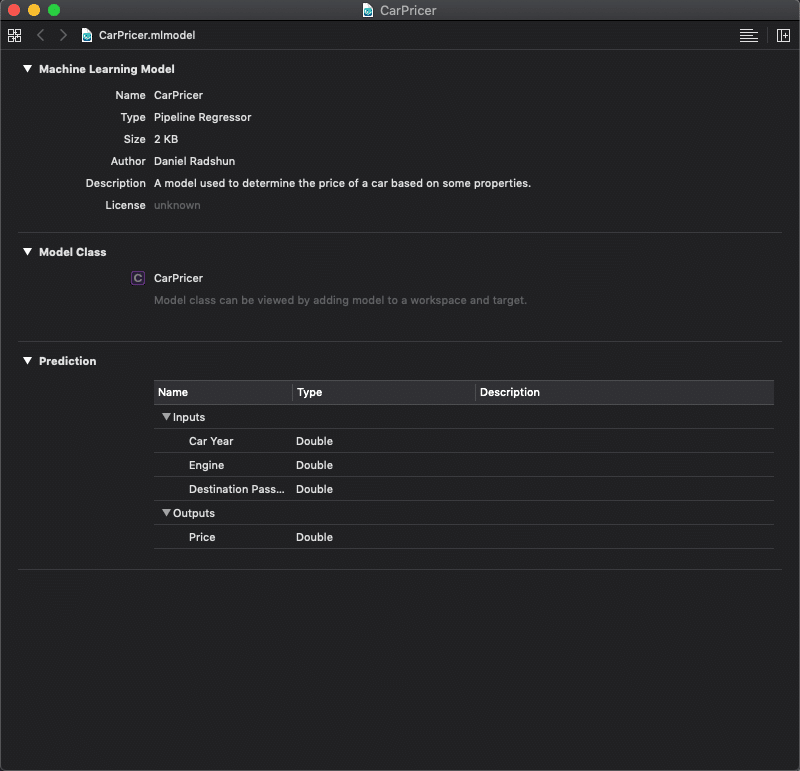
Run the code. Open the saved file from the “Documents”. The Core ML has many rescission ML algorithms types such as: Boosted Tree, Decision Tree, Linear, and Random Forests. As you can see, in our model Core ML chose to use “Pipeline Regressor” type. That’s very cool because you don’t need to have any algorithms knowledge, Core ML does all of this automatically for you.

Now, add the model into our Xcode project. Next, initialise the model as before. Call the prediction function and pass it 3 car’s parameters: year, engine and passed destination. Let the magic happened and get the “Price” parameter from the prediction. The Core ML generated the Price from the information of the other tree.
In the same way you can create any type of ML models you would like.