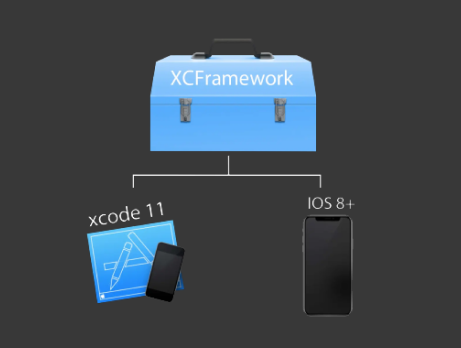
In WWDC 2019 Apple conducted a new code distribution format – XCFrameworks. Xcode 11 completely supports using and creating binary frameworks in Swift. Frameworks are self-contained, reusable chunks of code and resources that you can import into any number of apps and even share across iOS, tvOS, watchOS, and macOS apps. You can see instantaneously support devices and Simulator with the new XCFramework bundle type (similar to framework bundle). The XCFrameworks allows to support multiple architectures, platforms in one package and managing changes to your framework over time. XCFramework is born to replace the traditional universal framework format. Except others, the new format also allows providing as packing statistics libs with their headline files, as well as libs written in С/Objective-C.
I will now show you a short example of how to create and use XCFrameworks with 3 simple steps:
- Create regular Framework.
- Create XCFramework from framework:
- Add XCFramework to example project.
Step 1:
In Xcode, select File -> New -> Project.
Step 2:
Choose iOS -> Framework & Library -> Framework -> Next.

Step 3:
Choose project name.

Step 4:
Go to project target -> Build Settings -> Sreach.
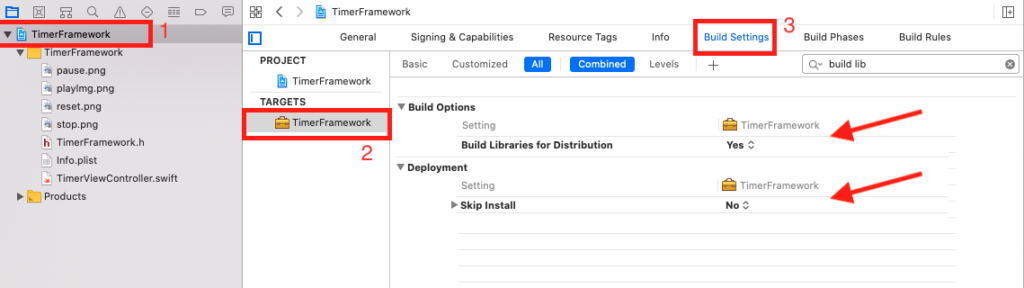
Change this to archive your scheme.
BUILD_LIBRARY_FOR_DISTRIBUTION = YES
SKIP_INSTALL = NO
Step 5:
After you finished creating framework and changed archive scheme you can add all the files you need to this framework.
Step 6:
Once you finish adding all the files to the framework build & run the project.

To add an assets (Image, Json , Java Script , all files) to your framework you should use project bundle and set the path so that the framework will know how to get it.
Example to image:
let image:UIImage = UIImage(named: "name of the image", in: Bundle(identifier: "com.name.TimerFramework"), compatibleWith: nil)
This is a repository to github with an example framework.
https://github.com/msmobileapps/TimerFramework
Now you should create archive to simulators and IOS devices
Step 1:
Open the terminal in the level project (where the xcodeproj)
Step 2:
Run these commands.
You should change the orange bold word to your name of your project.
* Archive for iOS
xcodebuild archive -scheme TimerFramework -destination="iOS" -archivePath /tmp/xcf/ios.xcarchive -derivedDataPath /tmp/iphoneos -sdk iphoneos SKIP_INSTALL=NO BUILD_LIBRARIES_FOR_DISTRIBUTION=YES
* Archive for simulator
xcodebuild archive -scheme TimerFramework -destination="iOS Simulator" -archivePath /tmp/xcf/iossimulator.xcarchive -derivedDataPath /tmp/iphoneos -sdk iphonesimulator SKIP_INSTALL=NO BUILD_LIBRARIES_FOR_DISTRIBUTION=YES
* Build xcframework with two archives
xcodebuild -create-xcframework -framework /tmp/xcf/ios.xcarchive/Products/Library/Frameworks/TimerFramework.framework -framework /tmp/xcf/iossimulator.xcarchive/Products/Library/Frameworks/TimerFramework.framework -output /tmp/xcf/TimerFramework.xcframework
when you finish building xcframework you can see the files in this path -> /tmp/xcf/.

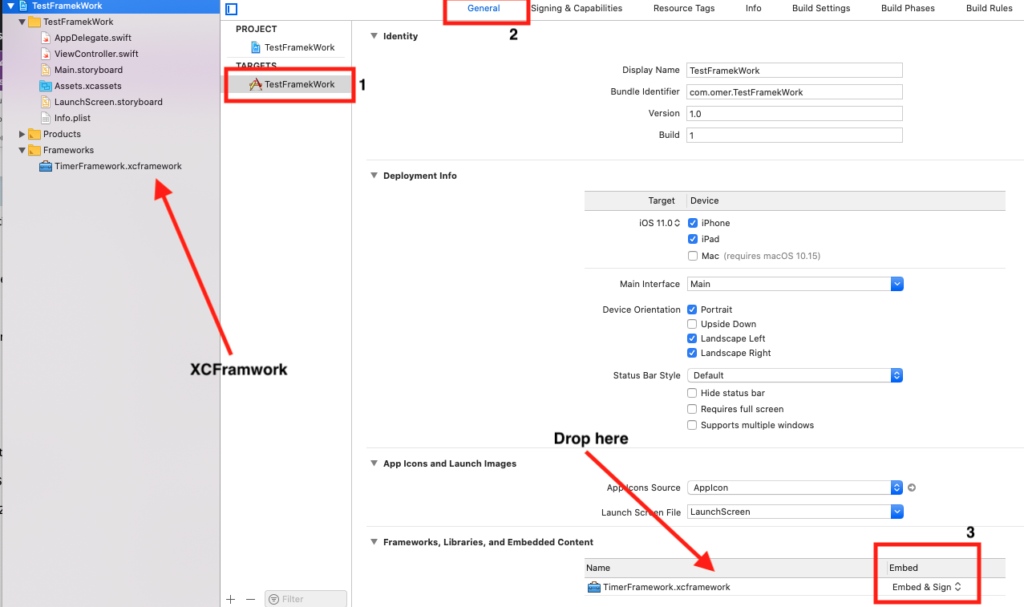
Step 1:
Drag and drop the xcframework file to “Frameworks,Libraries, and Embedded Content” . Select “Embed & Sign” for your newly added XCFramework.
Step 2:
import framework at the class where framework will be used:
import: “TimerFramework"
Step 3:
Create instance for ViewController:
let vc = TimerViewController.init()
Step 4:
present TimerViewController:
present(vc, animated: true, completion: nil)

This is a repository to github with an example XCFramework.